C-3 · Adding a New Applicant and Starting a Project
Book C — Daily User Guide · Part 2 Applicants & Intake · draft v1 (2026-08-29) Pilot chapter — settles the page format for the rest of Book C.
Who: caseworkers / loan coordinators / rehab specialists When: someone applies by paper, phone, or walk-in. (Applications that arrive through the ApplicationOS portal are imported instead — see ▸ C-4.) Time: about 5 minutes
What you'll end up with
One applicant record (the person and their addresses) and one project record linked to it (the program, staff, dates, and project folder). HousingOS keeps these separate on purpose: an applicant can have more than one project over the years, and the project is what everything else — income, bids, payments, loans — hangs off.
Every project gets an automatically generated project number (the A-Number). You never type or choose it.
Part A — Create the applicant
- On the Navigation form, under Navigation, click Add New Applicant (the person-plus icon). The header changes to ADD NEW APPLICANT, the padlock opens, and the form clears.
📷
C03-01
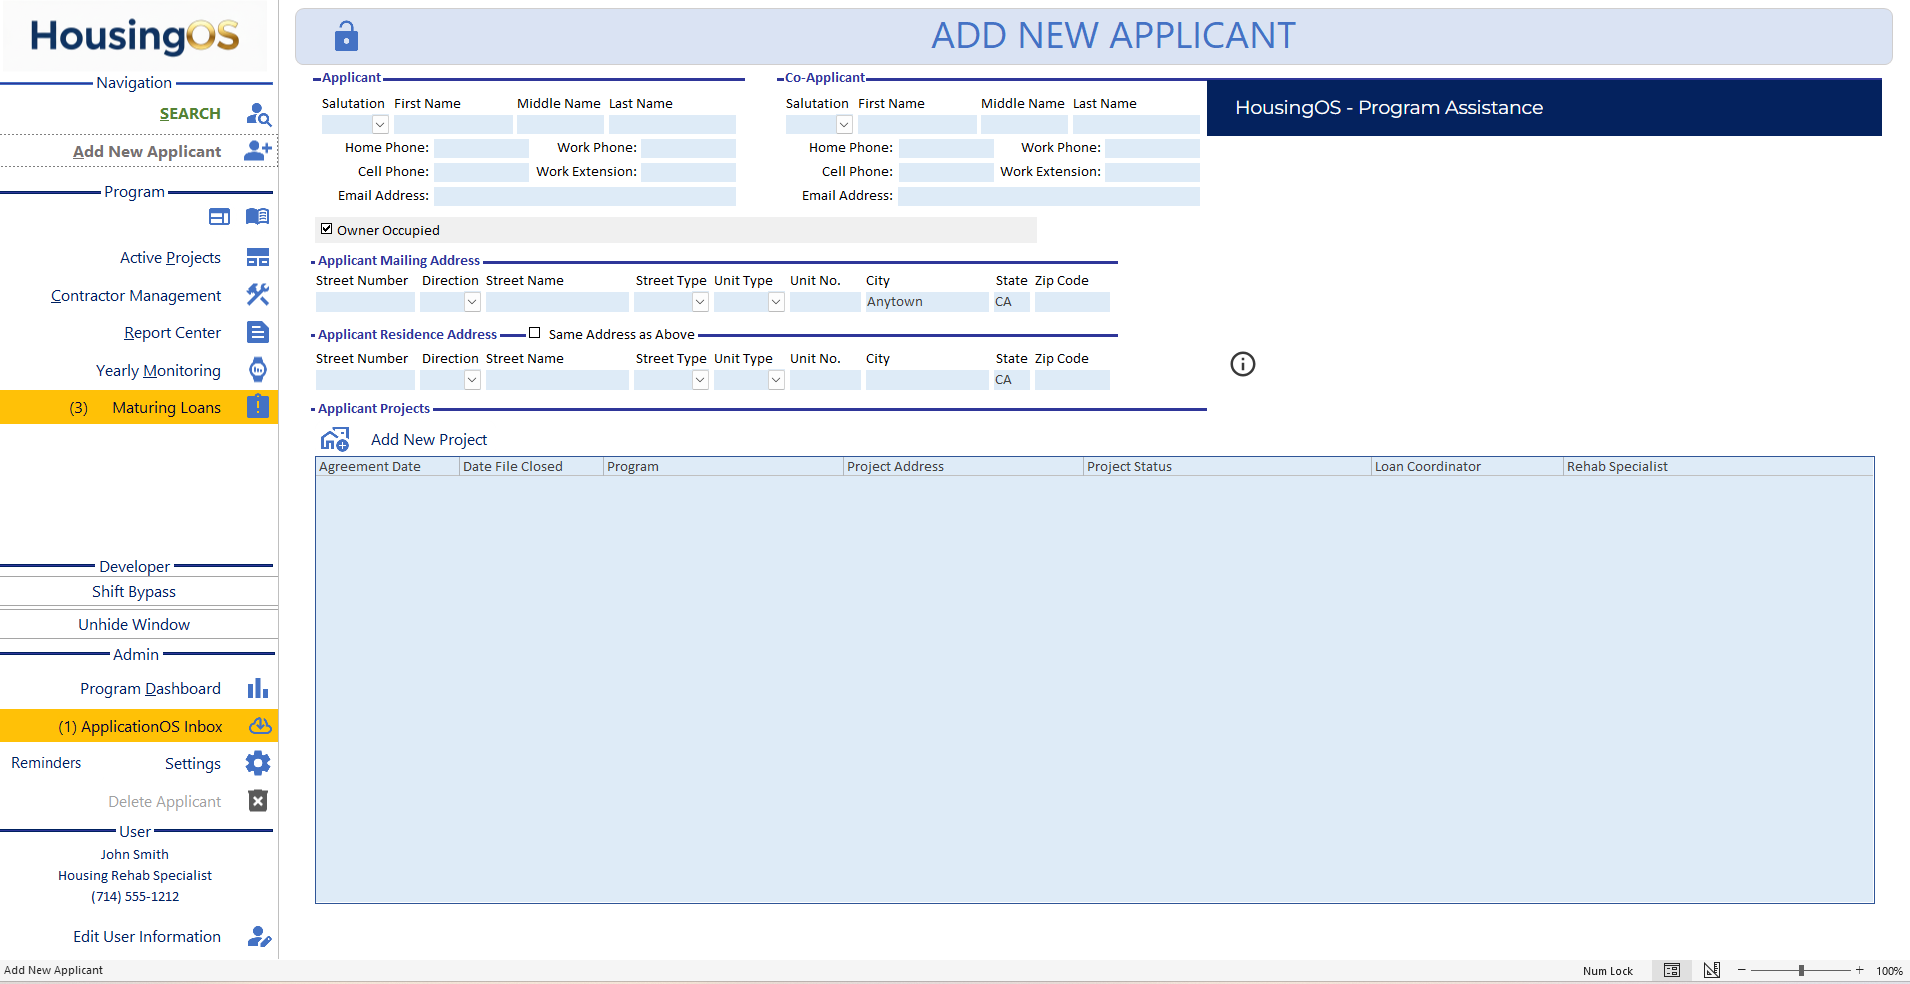
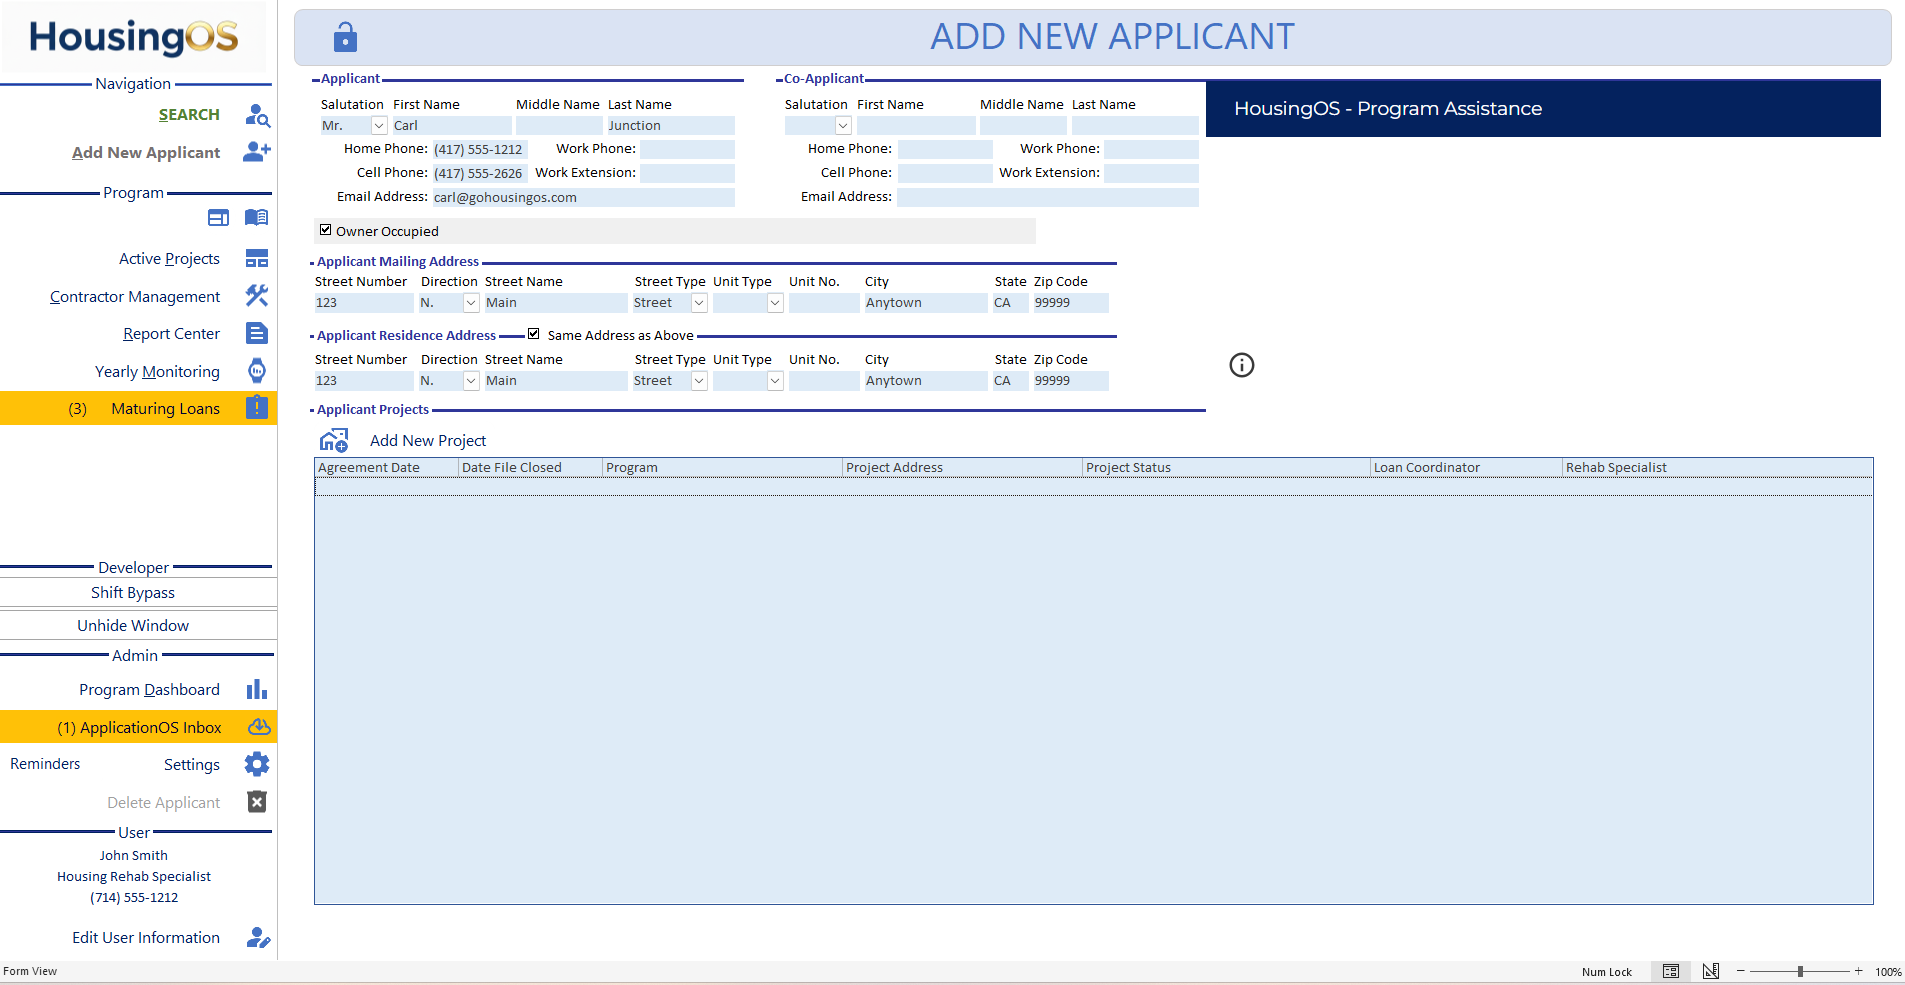
- Fill in the Applicant block (Salutation, First / Middle / Last Name, Home / Work / Cell Phone, Work Extension, Email Address) and, if there is a second person on title, the Co-Applicant block. Leave Owner Occupied ticked unless the applicant does not live at the property.
Then the two addresses — Applicant Mailing Address and Applicant Residence Address (Street Number, Direction, Street Name, Street Type, Unit Type, Unit No., City, State, Zip). Tick Same Address as Above to copy the mailing address into the residence address. City and State are pre-filled with your agency's defaults.
Three fields are required — the record is discarded if any is empty: Last Name (applicant), Mailing Street Name, Residence Street Name. Phones and email are optional but are carried onto the project and used for letters and emails, so enter them now if you have them.
📷 C03-02
- Click Save .
⚠ If you try to leave with a required field empty you'll see "This record is incomplete and will be deleted unless you cancel and complete it." Choose Cancel to go back and finish, or OK to throw the record away.
Part B — Start the project
- In the Applicant Projects section, click Add New Project (the house-plus icon). The PROJECT SETUP dialog opens.
📷
C03-03
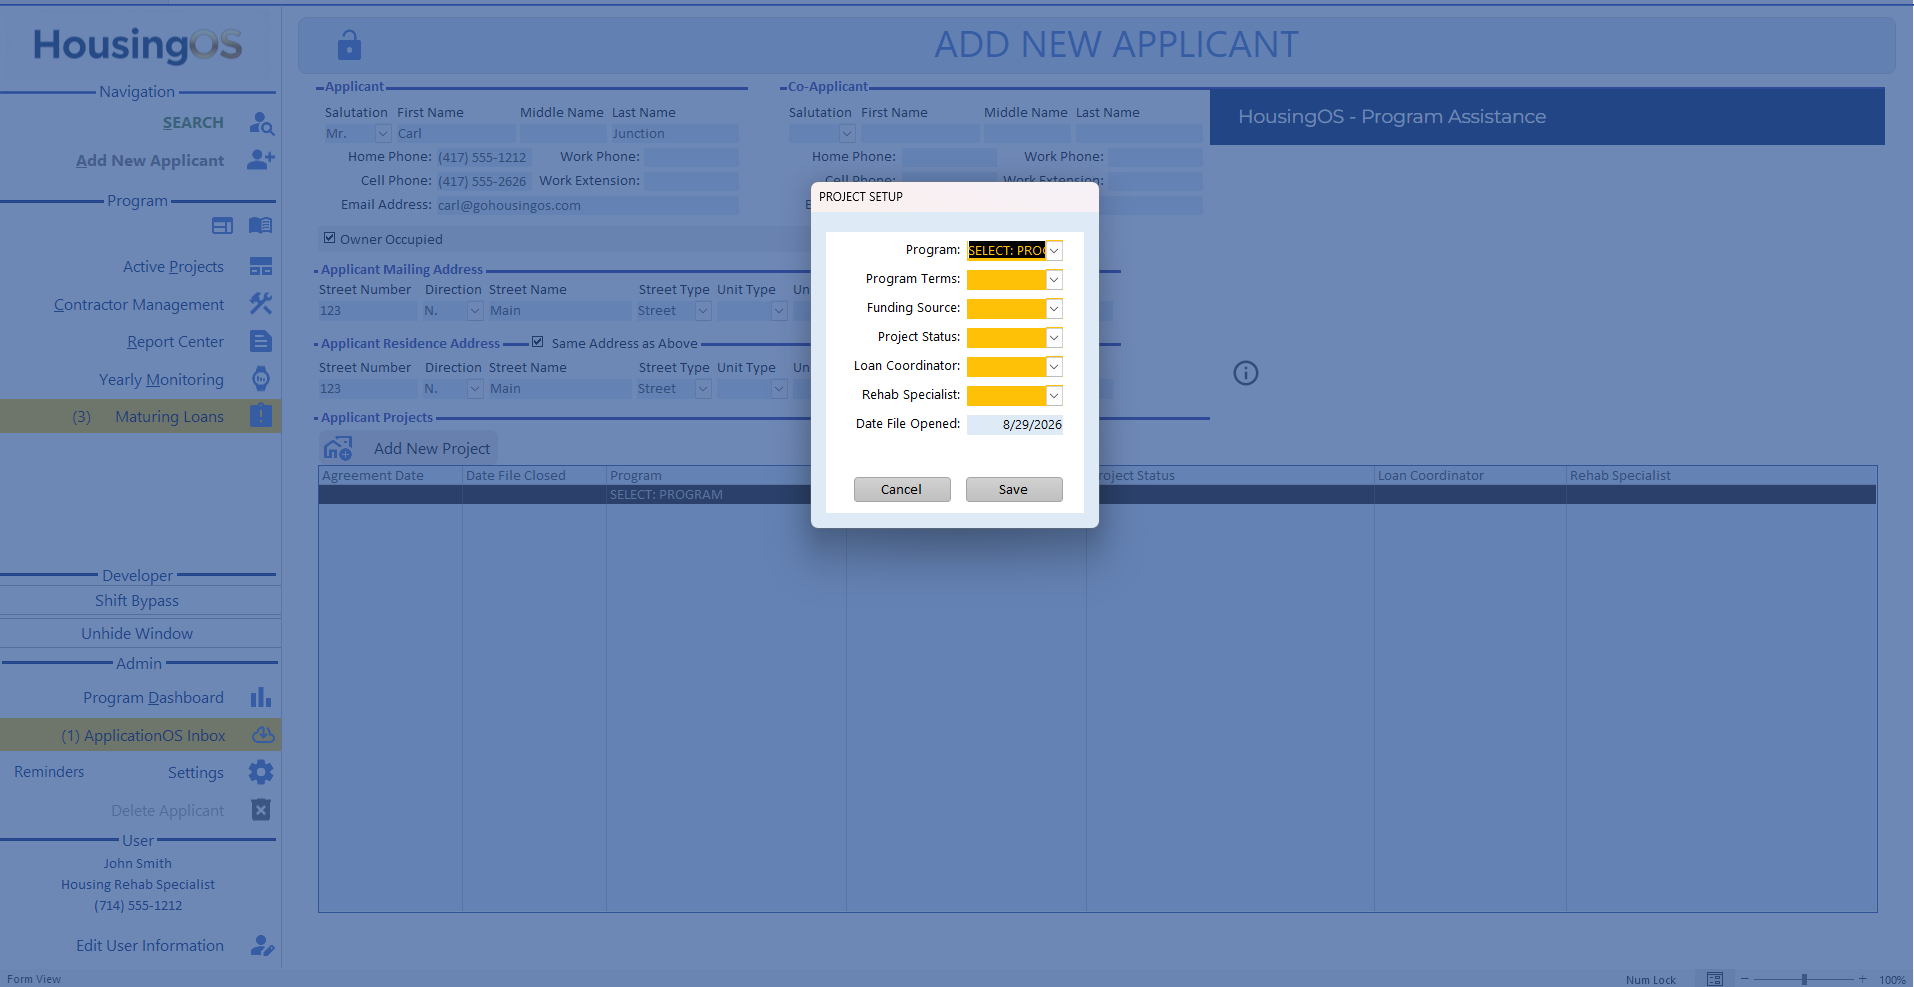
- Fill in the dialog — every field is required before Save (the yellow ones are still waiting for a choice):
| Field | Notes |
|---|---|
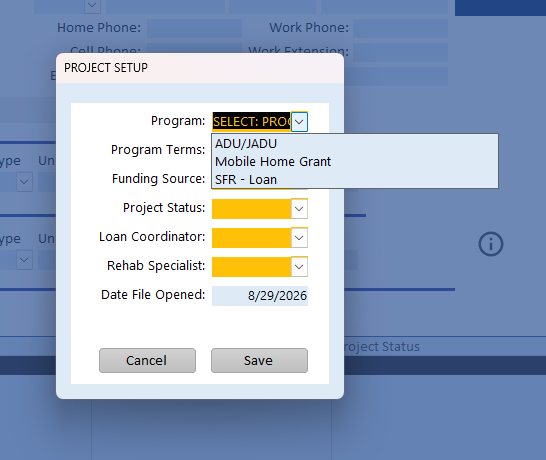
| Program | arrives as SELECT: PROGRAM; pick the rehab program (e.g. SFR – Loan, Mobile Home Grant, ADU/JADU). Choosing it loads that program's task checklist onto the project |
| Program Terms | the loan/grant terms set up for that program |
| Funding Source | the funding line this project will draw on |
| Project Status | the starting status (usually the first application step) |
| Loan Coordinator / Rehab Specialist | the staff members on the file |
| Date File Opened | defaults to today |
📷 C03-04
-
Click Save — it won't save until every field is filled. (Cancel — or closing the dialog with the X — removes the project you were about to create and returns you to the applicant; you'll be asked to confirm.)
-
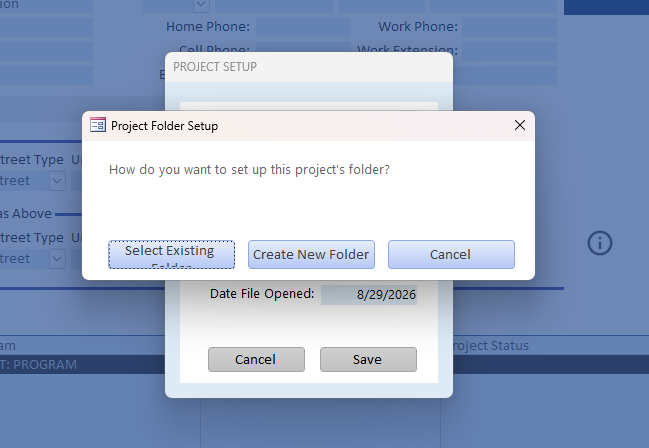
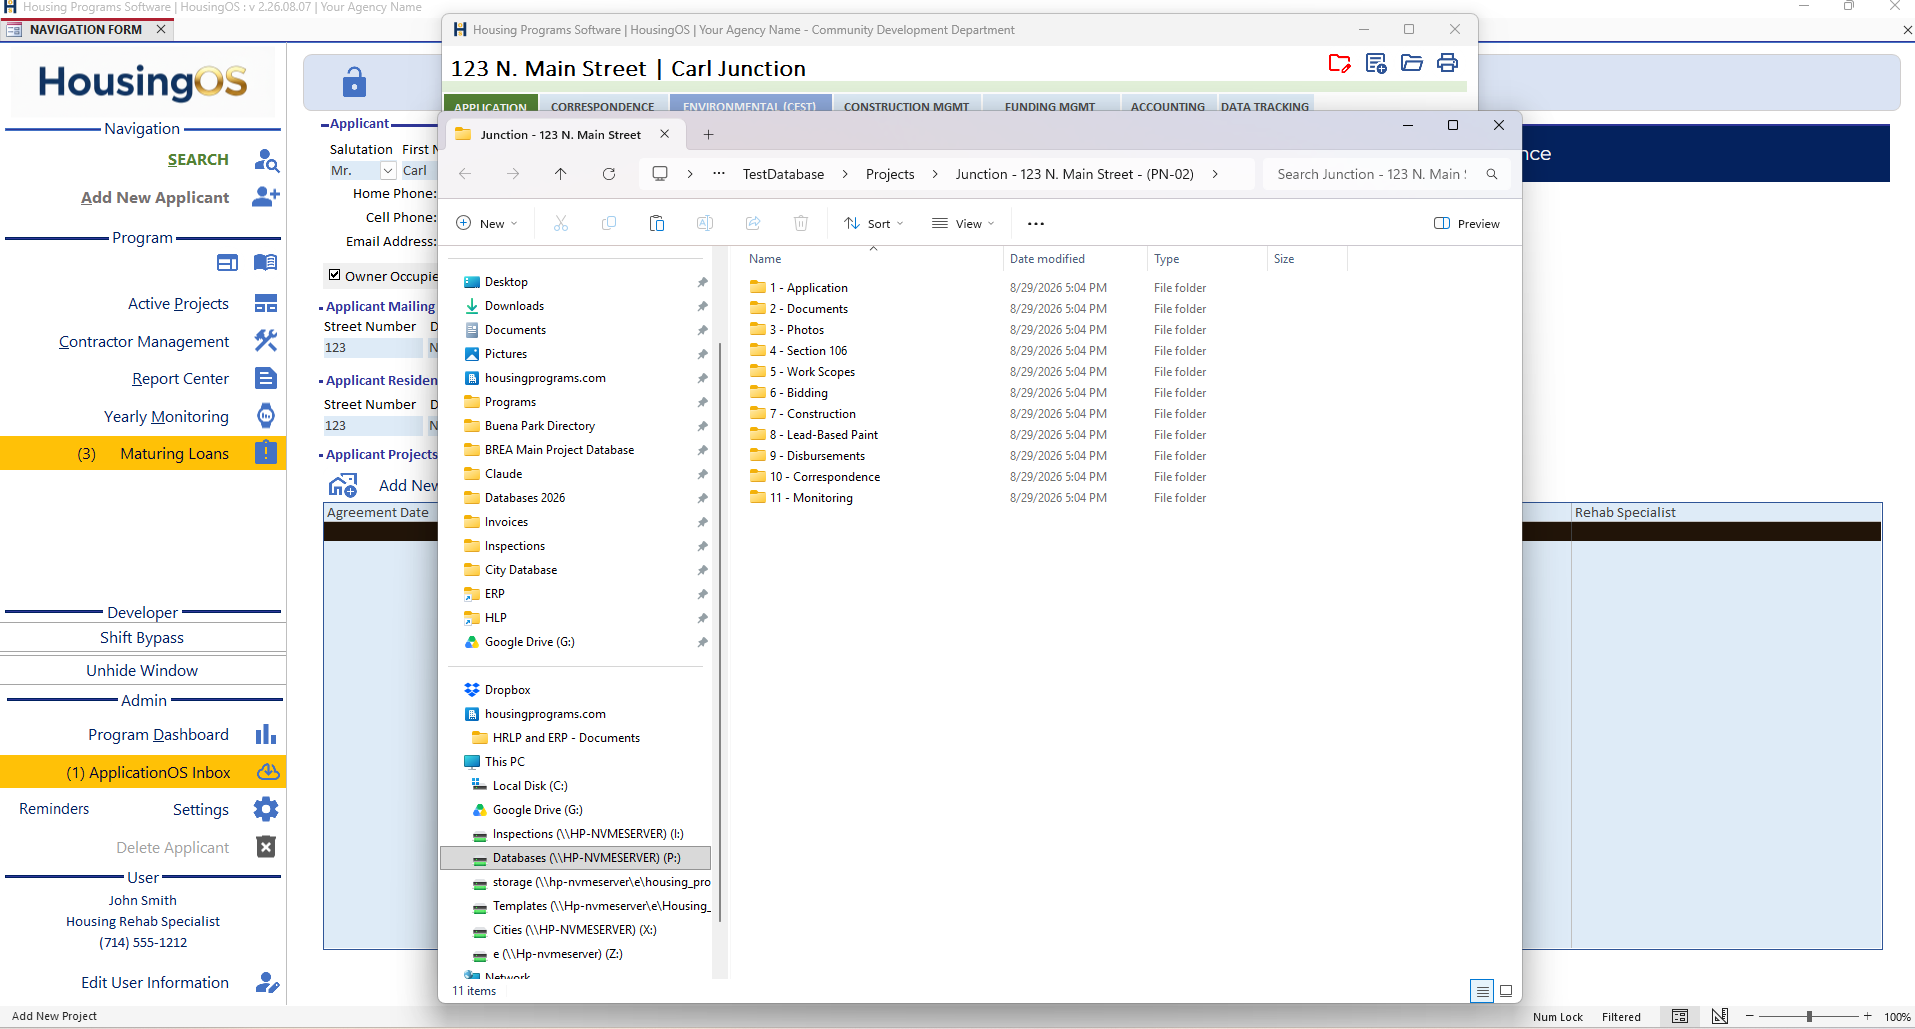
Project Folder Setup asks "How do you want to set up this project's folder?" - Create New Folder — HousingOS creates the folder in your agency's Projects location, named ‹Last name› – ‹street address› – (‹project ID›), with the standard numbered subfolders: 1 – Application, 2 – Documents, 3 – Photos, 4 – Section 106, 5 – Work Scopes, 6 – Bidding, 7 – Construction, 8 – Lead-Based Paint, 9 – Disbursements, 10 – Correspondence, 11 – Monitoring. - Select Existing Folder — browse to a folder that already exists (e.g. a file started before HousingOS). - Cancel — no folder yet; you'll be offered it again from the project folder button later. 📷
C03-05a
 ·
· C03-05b
-
The project window opens, titled with the address and applicant (123 N. Main Street | Carl Junction), with its tabs: APPLICATION · CORRESPONDENCE · ENVIRONMENTAL (CEST) · CONSTRUCTION MGMT · FUNDING MGMT · ACCOUNTING · DATA TRACKING. The icons at top right open the project folder, documents and print options.
-
On the APPLICATION tab, check the Project Address — it was copied from the residence address with Same as Residence ticked. If the property being rehabilitated is a different address, untick it and enter the property address (unit numbers may contain only letters, numbers, spaces and underscores). Enter Date Application Received if you have it (double-click a date box to stamp today).
You're done. The project now appears in the Applicant Projects grid on the Navigation form (Agreement Date, Date File Closed, Program, Project Address, Project Status, Loan Coordinator, Rehab Specialist), and you can move on to ▸ C-5 Household Composition and ▸ C-6 Income Determination.
Watch-outs
- Changing the Program later replaces the status list. You'll be warned: "Changing the program will replace this project's status list with the ‹program› defaults. Any custom status rows on this project will be lost. Continue?" Answer No unless you really mean to start the checklist over.
- "Include Applicant Name on Documents?" — this prompt appears when you edit the applicant's last name on the APPLICATION tab and the On Title box is unticked. Answer Yes if this person should be named on letters and loan documents.
- The applicant's household is created automatically. Saving the primary applicant's name adds them to Household Composition; add other members there, not here (▸ C-5).
- Don't create a second applicant record for a returning client. Use SEARCH on the Navigation form to find them, then click Add New Project — the new project links to the existing applicant.
- One applicant, several projects. The Applicant Projects grid lists every project for the selected applicant; double-click the right row to open it.
- Deleting an applicant or project needs a higher permission level; if the Delete button is greyed out, ask your agency administrator (▸ B-3).
Screenshot shot list (Demo backend only)
| Shot | Status |
|---|---|
| C03-01 … C03-05b | ✅ all received 08-29, filed in images/C03/ |
| C03-06 (optional) | project window APPLICATION tab after creation, address block visible |
Save as PNG in HousingOS Help\images\C03\. Use a demo applicant (e.g. the H1 family-of-4 persona) so nothing needs redacting.
Video script — "Starting a new project" (target 2½ min)
| # | On screen | Narration |
|---|---|---|
| 1 | Navigation form, idle | "When an application comes in by paper or phone, you'll enter it in two steps: the applicant, then the project. Portal applications skip this — they're imported, which we cover in the next video." |
| 2 | Click Add New Applicant | "Click Add New Applicant. The form clears and the header confirms you're adding." |
| 3 | Type name, mailing, residence | "Enter the applicant. Last name, mailing street, and residence street are required — HousingOS won't keep the record without them. Add phone and email now if you have them; they flow onto every letter." |
| 4 | Click Save | "Save." |
| 5 | Click Add New Project | "Now click Add New Project. Project Setup opens." |
| 6 | Program drop-down, other fields | "Pick the program first — it loads the program's task checklist. Then terms, funding source, starting status, and the loan coordinator and rehab specialist." |
| 7 | Save → folder prompt | "Save. HousingOS asks how to set up the project folder. Create New Folder builds it on your server with the standard numbered subfolders." |
| 8 | Project window opens | "The project opens — address and applicant in the title, and the tabs you'll work through: Application, Correspondence, Environmental, Construction, Funding, Accounting." |
| 9 | Application tab, project address | "Check the project address. If the property isn't the applicant's residence, untick Same as Residence and enter it. You're ready for household and income." |
| 10 | Outro card | "Next: importing an application from the portal." |
Open items for John (this chapter)
- Exact button captions marked (Add New Applicant / Save / Add New Project / Project Folder).
- Anything else users must set on the APPLICATION tab before moving on (Project Contact? Waiting List status)?
- Should "returning client → new project" be its own short chapter or stay a watch-out?